
http://www.newenglandautoshows.com/calendar-month/
http://www.newenglandautoshows.com/calendar-month/
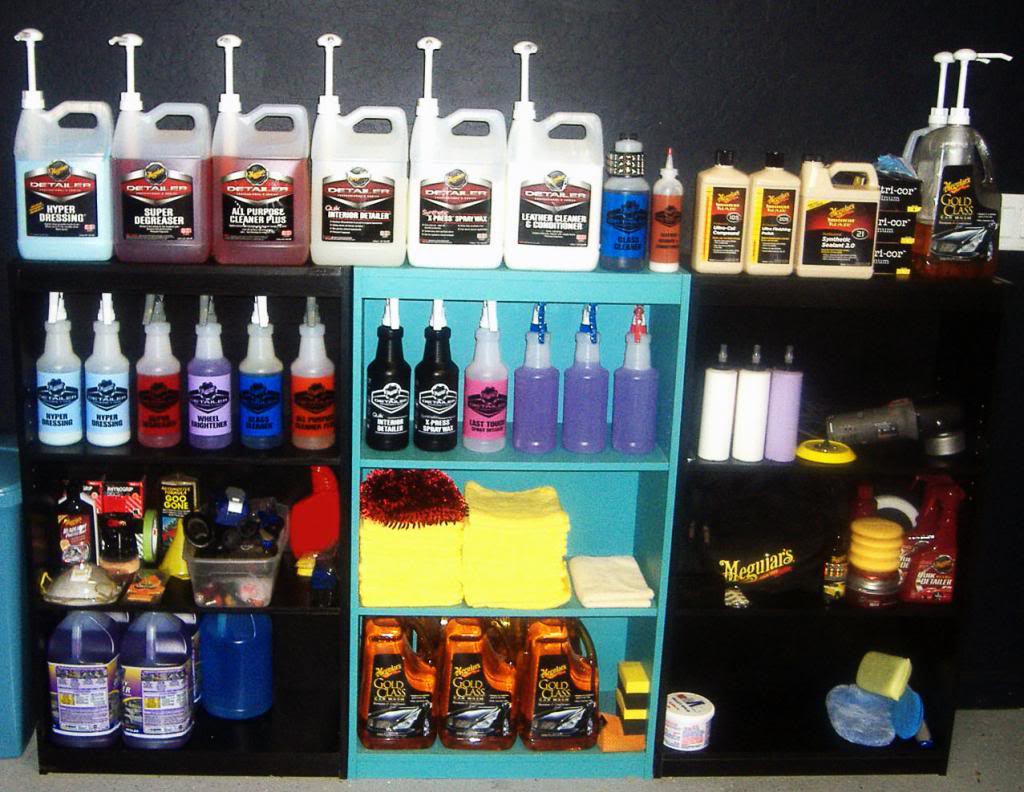
The car care product market is a highly competitive one as there are hundreds of brands to choose from. But Meguiar’s, which has been around since 1901, has always dominated the scene with its range of best-selling auto detailing products. Whether you need a car wash shampoo, wax, glaze, clay bar, tire dressing or detailing accessories like polishers, buffing pads and microfiber towels, Meguiar’s has it all. Out of this extensive range, we have chosen 5 must-have Meguiar’s auto detailing products for detailing enthusiasts.
This pH balanced car wash product is designed to make your job easier. In one step, you can both shampoo and condition your car without worrying about damaging the wax. It will gently and effectively remove the toughest of dirt, dust, grime and other contaminants off your car while conditioning the paint, leaving it beautiful and shiny. Pamper your car with this premium product and you will be more than satisfied.
This product is a great interior detailer for many reasons: 1) It works on all surfaces, even LCD screen displays; 2) It’s an efficient “spray and wipe” product that can accomplish the task in a very short period; 3) Amazing streak-free cleaning that removes stains, dirt and dust; 4) The UV blockers in the solution will prevent aging of upholstery; 5) It will leave a nice citrus aroma inside your car; and 6) All these great features come at a very reasonable price. What more do you need from an interior detailer? In fact, this is one of the Meguiar’s auto detailing products that has become part of DetailXPerts’ all-time favorites.
This kit is complete with 2 clay bars, Meguiar’s Quick Detailer lubricant and a high quality microfiber towel. The clay bars are non-abrasive and can be used to get rid of contaminants on car paint, glass and metal. The lubricant ensures the smooth sliding of the clay bar over each surface. It also prevents paint scratches from contaminants caught on the bar during the process. The soft micro fiber towel completes the process by quickly absorbing water thus leaving a smooth shine. This is definitely one of the Meguiar’s auto detailing products that provides true value for your money!
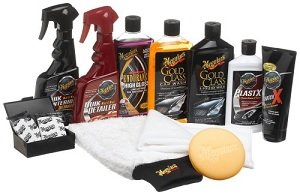
Car owners and professional detailers alike swear by this product. It is easy to apply and remove. The ThinFlim Technology Meguiar’s uses ensure smooth application without white residue. The synthetic polymers in the solution facilitates water beading while also enhancing the mirror-like shine that you’ve always wanted for your car. Unlike other waxes, this product can be applied under direct sunlight or on a warm surface. Finally it will last longer than most other car wax types.
A non-abrasive cloth is a must-have detailing accessory in your car wash kit. Microfiber towels have proven to be more car-friendly than others like terry cloths. Meguiar’s microfiber towels are among the best in the industry. They are dual sided, soft and have the ability to absorb water three times more than a terry cloth. They also give a swirl-free mirror-like finish for polish and wax. This 3 towel pack is the best investment you will make on car care products.
Meguiar’s auto detailing products will keep your car happy for a very long time. They are not only highly effective but also reasonably priced, which make them ideal for all car enthusiasts. We at DetailXPerts only use the best auto car care products in the market, including Meguiar’s. These products at the hands of our highly trained professionals have satisfied a large number of car owners. Contact us to get more information about our detailing services.
Enjoyed this post? Sign up for our newsletter to receive more valuable tips, ideas, coupons, and extras!
PROBLEM / SOLUTION
Consumer Auto Parts
Cold weather can wreak havoc on your vehicle. Don’t wait until it freezes – winterize your car or truck with these expert tips from Turtle Wax.
Check Tires: Damaged tires are no match for sleek, slippery roads. Get tires winter-ready by examining for thin or uneven tread wear, which reduces traction and can be very dangerous in winter weather. Cut or damaged sidewalls are also weak areas that can collapse under severe weather conditions.
Remember to check the air pressure before and during winter months to ensure the best traction and mileage. Once your tires are in good shape, apply tire cleaner and coating such as Turtle Wax® Wet’N Black™ Ultra Wet Tire Shine to help repel winter elements for months!
Wax On, Winter Off: Winter weather can dull your car’s paint and shine, making it susceptible to rust and oxidation. To keep your vehicle clean and protected all winter long make sure to thoroughly wax your car before the cold weather hits.
For best results, wash your car with a product like Turtle Wax® ICE ® Wash and follow with Turtle Wax® ICE® Liquid or Paste Wax to protect your vehicles surface from road salt and snow. Concentrate on the lower parts of your car such as behind the wheels, quarter panels, and front grille where ice, snow and salt hit hard and stay the longest.
Check Fluids: Maintaining proper fluid levels is critical to keeping your car working properly during the winter. A common mistake is forgetting to replace or top-off summer windshield wiper fluid with a winter blend that will not freeze when the temperature drops. Check your antifreeze and oil levels to prevent internal damage to your car, and keep your gas tank at least halfway full to help prevent gas line freeze. Winter prep should also include an oil change.
Make sure you’re not stranded in the cold with a car that won’t start. Use Marvel Mystery Oil® as an engine and fuel additive to promote better cold weather starting.
Care for Your Interior: Winter elements can also cause damage to the inside of your car. When tracked-in mud, slush and snow enter your car, prevent it from staining your interior and keep your floor mats clean, use Turtle Wax® Quick & Easy ™ Interior 1 Carpet & Upholstery Cleaner. Also, be sure to remove any water-based products in containers that can freeze and crack, as well as any unnecessary items that can weigh down your car and lower fuel efficiency.
Always Be Prepared: Winter can be unpredictable; so don’t wait for the first snow to fall to put the ice scraper and snow shovel in the car. Keep an emergency winter kit in the trunk in case of an accident or other bad weather situation. Recommended emergency items include a small first aid kit, flashlight, blanket, gloves, shovel, and road flares.

Winter Driving Safety
Driving safely in winter weather can be a challenge for even the most experienced driver. It’s easy to forget after months of mild conditions that snow and ice demand careful driving and special preparation for your vehicle. But when 17 percent of all vehicle crashes occur during winter conditions it’s clear that we could all use a refresher when it comes to making our way through a winter wonderland.*
Ready Your Vehicle
Driving safely begins before you even get on the road. Regular tune-ups and maintenance are the starting point for safe driving year-round. In winter, pay special attention to your vehicle’s battery, wipers, coolant, tires and other systems that can take a beating when the temperature drops. If you’re using snow tires, have them installed before the snow begins to fall. When you know your vehicle is ready for the road, clear your car of snow, ice or dirt from the windows, forward sensors, headlights, tail lights and backup camera.
Ready Yourself
Drive slowly. It’s harder to control or stop your vehicle on a slick or snow-covered road. Increase your following distance enough so that you’ll have plenty of time to stop for vehicles ahead of you. Also remember that every vehicle handles differently; this is particularly true when driving on wet, icy, or snowy roads. Take the time to learn how it handles under winter weather driving conditions. Before heading out, know the weather and traffic conditions, and plan your route accordingly. Give yourself more time to get where you’re going because you’ll be driving more slowly in inclement weather.
Ready for an Emergency
Even if you and your vehicle are prepared, crashes happen. Vehicles break down. Any of us can get caught out in the elements and help might not be just around the corner. Make sure your vehicle is stocked to help get you out of trouble or to keep you safe until help arrives. Keep blankets, flashlights, jumper cables, and flares or emergency lights in your vehicle. Even if you don’t need them, they can be used to help someone else in need on the road.
Safe Driving: Rain, Sleet, Snow or Otherwise
Winter driving demands special care; safe driving is a year-round habit. You and everyone in your vehicle should be wearing seat belts for every ride. Children should be in age- and size-appropriate child seats. Never drive after drinking. Never drive when distracted by an electronic device or anything else. Those are the essentials for safe driving, whatever the weather.
More Winter Driving Tips
There’s a lot that goes into preparing yourself and your vehicle for winter, so check out NHTSA’s Winter Driving Tips to ensure safe travels.
In recognition of October as AAA Car Care Month, the nation’s largest motor club reminds drivers seasonal checkups are essential for worry-free driving as weather changes
With the change of seasons most people examine their wardrobes. Last season’s coat is inspected for wear, and boots, sweaters and wool slacks come out of the closet for scrutiny. AAA reminds motorists that cars also need seasonal checkups.
AAA recommends that motorists use a simple checklist to determine their car’s fall and winter maintenance needs. Most of the items on the checklist can be inspected by car owners in less than an hour, but several others should be performed by a certified technician.
One way to identify a reliable, high-quality repair facility with certified technicians is to look for one that is AAA Approved. AAA Approved Auto Repair facilities must meet and maintain high professional standards for customer service, technician training, service equipment, warranties and cleanliness. There are nearly 8000 AAA Approved Auto Repair facilities in the U.S., and nearby shops can be quickly located at AAA.com/repair.
Winter Car Care Checklist
Battery and Charging System – Have the battery and charging system tested by a trained technician. A fully charged battery in good condition is required to start an engine in cold weather. AAA members can request a visit from a AAA Mobile Battery Service technician who will test their battery and replace it on-site, if necessary. AAA Approved Auto Repair facilities can also test and replace weak batteries.
Battery Cables and Terminals – Check the condition of the battery cables and terminals. Make sure all connections are secure and remove any corrosion from the terminals and posts.
Drive Belts – Inspect belts for cracks or fraying. Don’t just look at the smooth top surface of the belt, but turn it over and check the grooved underside where most belt wear occurs.
Engine Hoses –Visually inspect the cooling system hoses for leaks, cracks or loose clamps. Also, squeeze the hoses to check for any that may be brittle or excessively spongy feeling and in need of replacement.
Tire Type and Tread – In areas with heavy winter weather, changing to snow tires on all four wheels will provide the best winter traction. All-season tires will work well in light to moderate snow conditions, providing they have adequate tread depth. If any tire has less than 3/32-inches of tread, it should be replaced. Uneven wear on the tires can indicate alignment, suspension or wheel balance problems that should be addressed to prevent further damage to the tires.
Tire Pressure – Check tire pressure more frequently during winter months. As the temperature drops, so will the pressures in the tires—typically 1 PSI for every 10 degrees Fahrenheit. The proper tire pressure levels can be found on a sticker located on the driver’s side door jamb. And, don’t forget to check the spare.
Air Filter – Check the engine’s air filter by holding it up to a 60-watt light bulb. If light can be seen through much of the filter, it is still clean enough to work effectively. However, if the light is blocked by most of the filter, replace it.
Coolant Levels – Check the coolant level when the engine is cold. If the coolant level is low, add a 50/50 solution of coolant and water to maintain the necessary antifreeze capability. The level of antifreeze protection can be checked with an inexpensive tester available at any auto parts store.
Lights – Check the operation of all headlights, taillights, emergency flashers, turn signals, brake lights and back-up lights. Replace any burnt out bulbs.
Wiper Blades – Blades should completely clear the glass with each swipe. Replace blades that leave streaks or miss spots. In areas with snowy conditions, consider installing winter wiper blades that wrap the blade in a rubber boot to prevent ice and snow buildup that can prevent good contact between the rubber blade and the glass.
Washer Fluid – Fill the windshield washer fluid reservoir with a cleaning solution that has antifreeze components for cold weather use.
Brakes – Have brakes inspected by a certified technician to ensure all components are in good working order.
Transmission, Brake and Power Steering Fluids – Check all fluids to ensure they are at or above the minimum safe levels.
Emergency Road Kit – Update the car’s emergency kit for winter weather. The kit should include:
As North America’s largest motoring and leisure travel organization, AAA provides more than 52 million members with travel, insurance, financial and automotive-related services. Since its founding in 1902, the not-for-profit, fully tax-paying AAA has been a leader and advocate for the safety and security of all travelers. AAA clubs can be visited on the Internet at AAA.com.
Check Out Our November Flyer
 Big Savings With This Coupon!

 Tip #1
Use Heavy Duty Gel to cling to vertical surfaces. When degreasing areas under your car like differential covers or oil pans before you change out any of the functional fluids in your car.
 Tip #3
Use any one of our Brake Parts Cleaners. Dissolve and flush away built up brake dust, caliper fluid, grease and oil from the parts you’re replacing to ensure a proper fit for your new brake parts.
 Tip #2
Use Squeal Medic on your drums and rotors. Before you finish up your brake job to help stop any unwanted squeaks or squeals from starting while you brake in your new pads.
 Tip #4
Use Bug-n-Tar remover in the summer months. When most insects get stuck to your grill, bumper and hood area to keep your painted surfaces and metals free from discoloration and corrosion problems caused by insects.

1. Park vehicle on level surface, engage parking brake and turn off engine. If necessary, raise front of vehicle by driving it onto a ramp or by jacking it up and supporting it with jack stands.
CAUTION: NEVER GET UNDER A VEHICLE SUPPORTED ONLY BY A JACK! WE ALSO RECOMMEND WHEEL CHOCKS TO HELP PREVENT WHEELS ON THE GROUND FROM ROLLING.
2. Open the hood.
3. Locate the engine oil dipstick and remove (helps the oil flow when draining).

4. Once the vehicle is safely and securely supported, put on safety glasses, crawl under the vehicle and locate the engine’s oil pan. (See owner’s manual for reference.)
5. Locate the oil drain plug, which is a long bolt head at the bottom of the pan. The drain plug allows the oil to drain out of the pan. (Note: Some vehicles have two drain plugs.)
6. Position a container, such as an approved oil catch pan, under the drain plug. Make sure the catch pan is large enough to hold the volume of oil expected to drain out of the engine. Check your owner’s manual for the volume of oil that you car requires.

7. Loosen the drain plug using a box-end wrench or 6-pt. socket. Carefully remove the plug by hand, making sure the catch pan is underneath the plug hole. Oil will flow rapidly from the hole, but allow several minutes for all old oil to drain out. (See vehicle owner’s manual for additional information.) CAUTION: OIL MAY BE HOT!

8. Wipe the oil pan threads and oil drain plug with a rag, and visually inspect the condition of the oil pan and oil drain plug threads and gasket. Buy a replacement drain plug if you have any concerns about the condition of the plug. Replace the drain plug gasket if needed (some OEMs recommend this). Once the oil is finished draining, reinstall the oil drain plug and tighten with the correct box-end wrench or 6-pt. socket to the manufacturer-specified torque. (See owner’s manual.)

9. Locate the oil filter. If the old and new oil filters are not the same, double-check the application to be sure you have the correct filter. (See vehicle’s owner’s manual for additional information.)
10. Position an oil catch pan under oil filter to catch any residual oil remaining inside filter.

11. Loosen the oil filter or oil filter cap with oil filter wrench, and allow the oil to drain from the oil filter.
12. Remove the oil filter. Check to make sure the filter gasket has come off with the filter. If it’s still clinging to the engine mounting plate, remove it and any remaining residue.

13. Place a light coating of new oil on the gasket of the new oil filter so it will install smoothly onto the engine. (Note: Do not use grease!) By hand, install the new oil filter onto the engine by turning in a clockwise direction. Once the oil filter gasket first contacts the mounting plate gasket surface, tighten the filter according to the directions for your application (usually found on the new oil filter or oil filter box), preferably by hand. Generally, this is three-quarters to one full turn after the filter gasket contacts the engine. (NOTE: Cartridge oil filter replacement procedures may differ. See owner’s or service manual for instructions.)

14. Under the hood, remove the oil fill cap and pour in the correct amount of Pennzoil® motor oil of the correct viscosity with a funnel. (See vehicle’s owner’s manual for recommended grade, specification and amount.)
15. Replace the oil fill cap.

16. Start the engine and run at idle for minimum of 30 seconds. Carefully inspect under the vehicle for oil leaks (especially by oil drain plug and oil filter). If leaks are visible, shut off the engine immediately and have the leaks repaired.

17. Shut off the engine and allow 30 seconds for oil to settle in the engine. Carefully inspect the area beneath the vehicle for oil leaks.
18. Safely lower the vehicle to level ground.

19. Install and remove oil dipstick and check for proper oil level, adding more oil if necessary. (See the vehicle’s owner’s manual for oil capacity and recommended oil level on dipstick.)
20. Repeat oil change with Pennzoil® motor oil as directed by manufacturer’s guidelines.
These instructions are intended as general guidelines. Please consult your owner’s or service manual for specific instructions on changing the oil and filter on your vehicle. Use extreme caution when lifting or jacking any vehicle.
Drivers know immediately when they hit a pothole, but what they don’t know is if their vehicle has been damaged in the process. While tires and wheels can be visually checked, potholes can also cause considerable damage to the steering, suspension and alignment systems that you just can’t see.
Motorists will spend nearly $5 billion on car repairs from damage caused by potholes, according to a recent report by WJLA-TV in Washington D.C. The U.S. PIRG Education Fund and the American Association of State Highway and Transportation Officials (AASHTO) estimate that poor road conditions cost the average motorist around $335 a year.
If you hit a pothole while driving, the Car Care Council recommends that you watch for the following warning signs and have your vehicle inspected by a professional technician without delay.
The Car Care Council is the source of information for the “Be Car Care Aware” consumer education campaign promoting the benefits of regular vehicle care, maintenance and repair to consumers. For a copy of the council’s Car Care Guide or for more information, visit www.carcare.org.
Consumer Auto Parts